How to create a campaign with Teezily
With Teezily you can easily customize your dreams by creating a Campaign with only three simple steps: Design your product, set up the sales goal and the selling price and add a title and description.
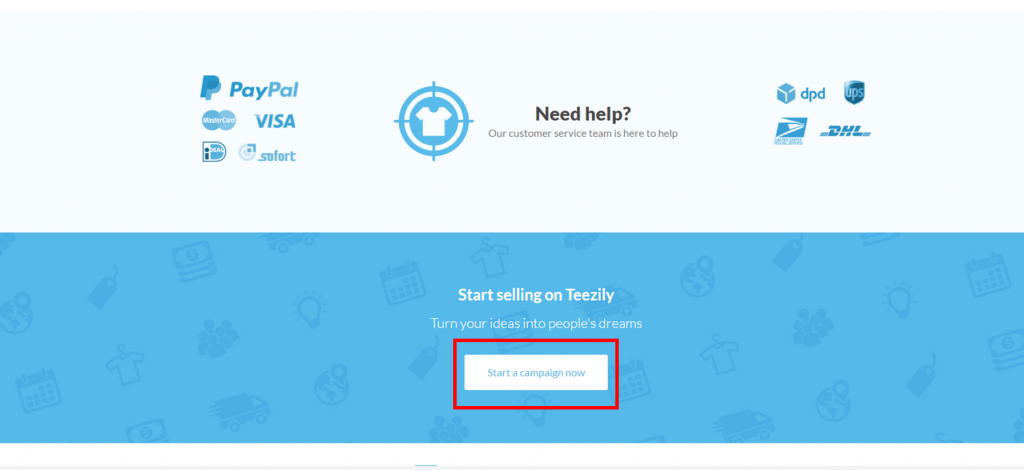
This article will give you step by step instructions on how to create a campaign using Teezily’s customization tool Teezilab.
You can access the tool by visiting our website www.teezily.com and clicking on “Start a campaign now”
Step 1: Design your product
The first step is the design of your product. The only thing you have to do is to choose a product by selecting the model and the color that you want, and upload a design (image and/or text).
1.Choose the model and color of the main product that you want to customize and offer to your audience
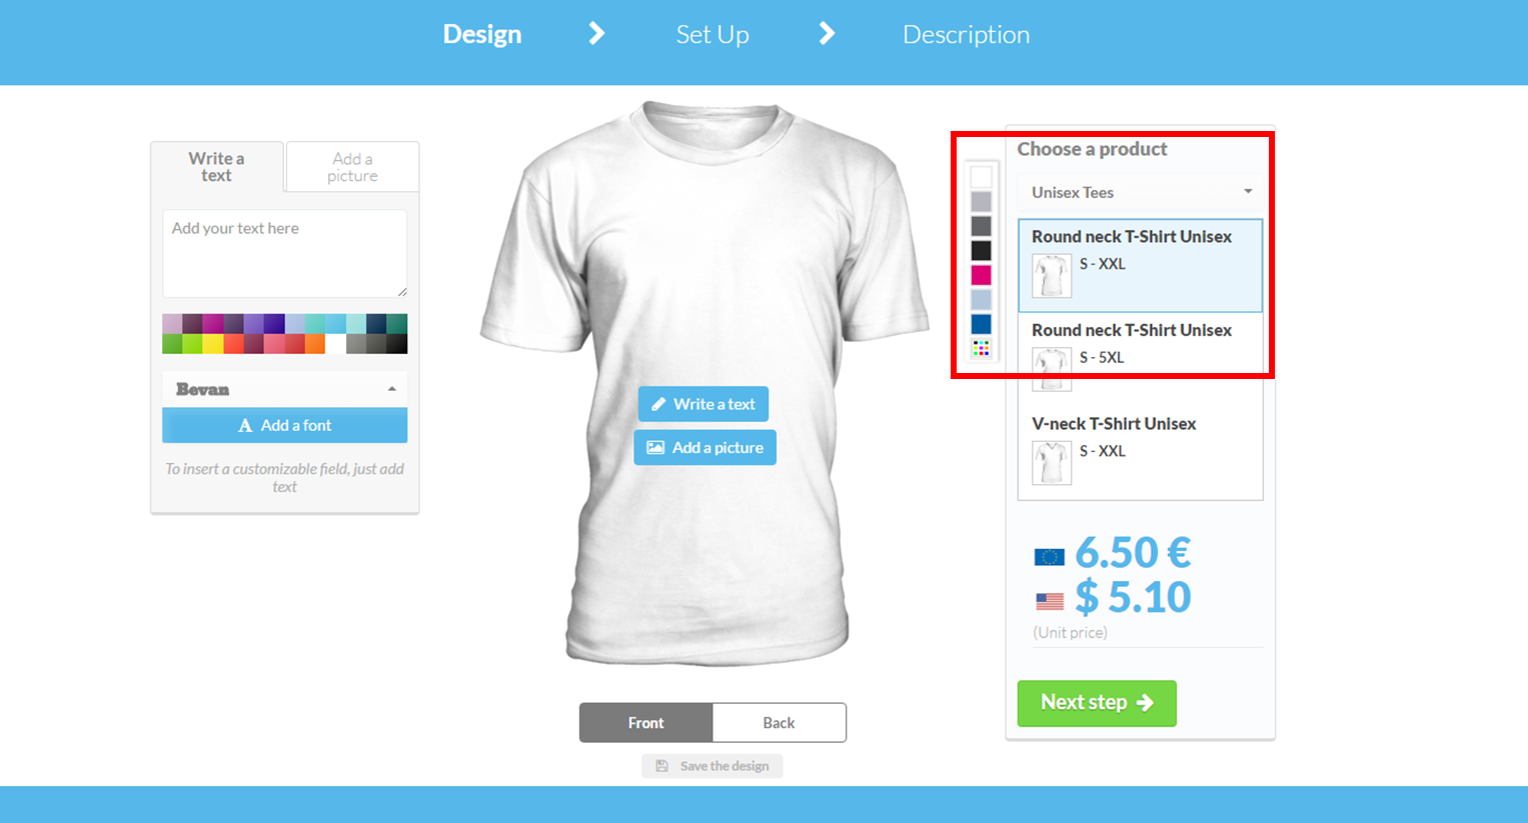
2. Upload a design or create one using the differents fonts available
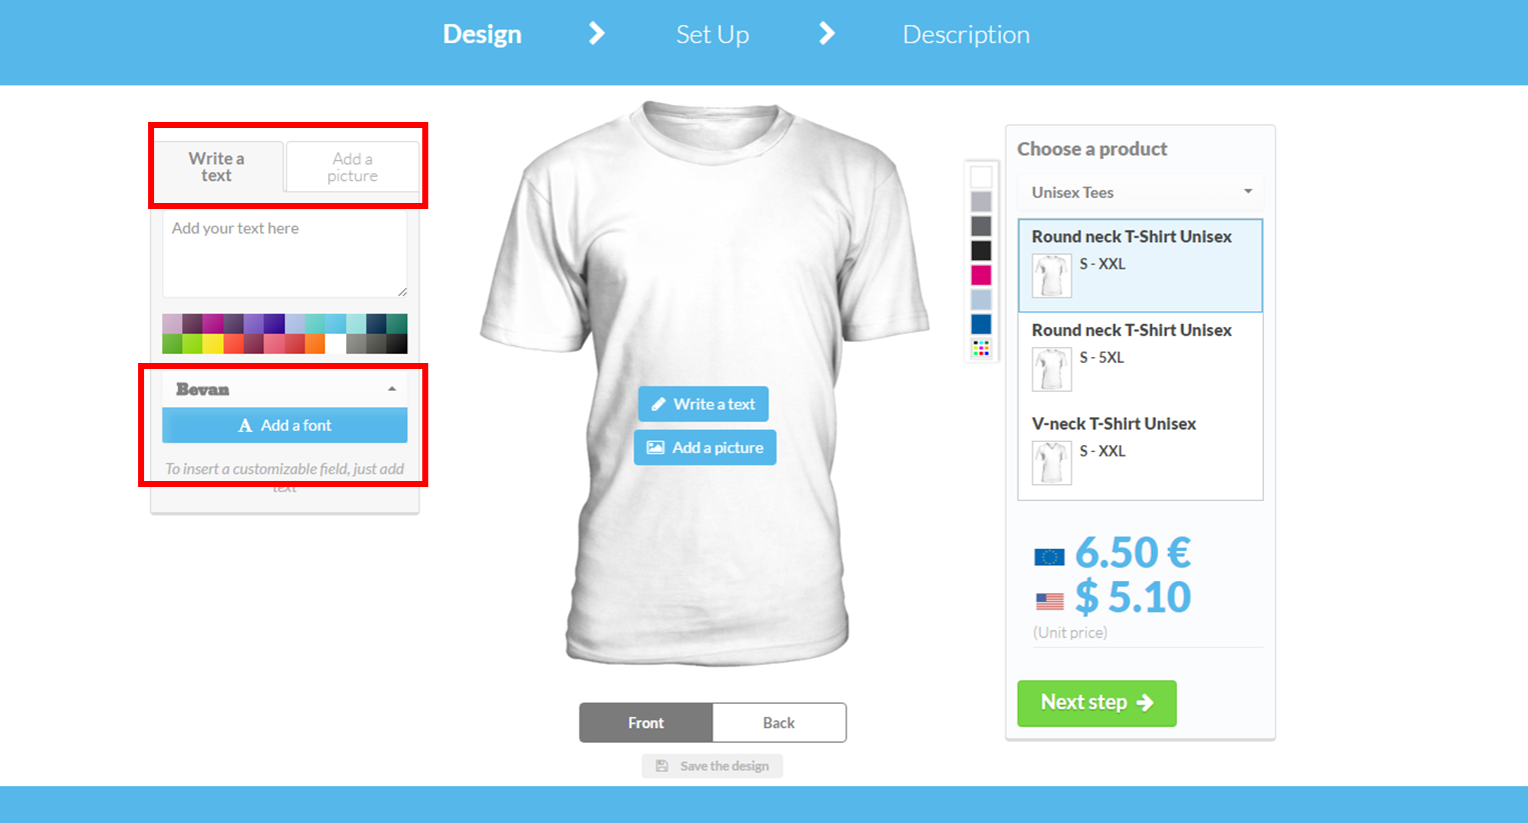
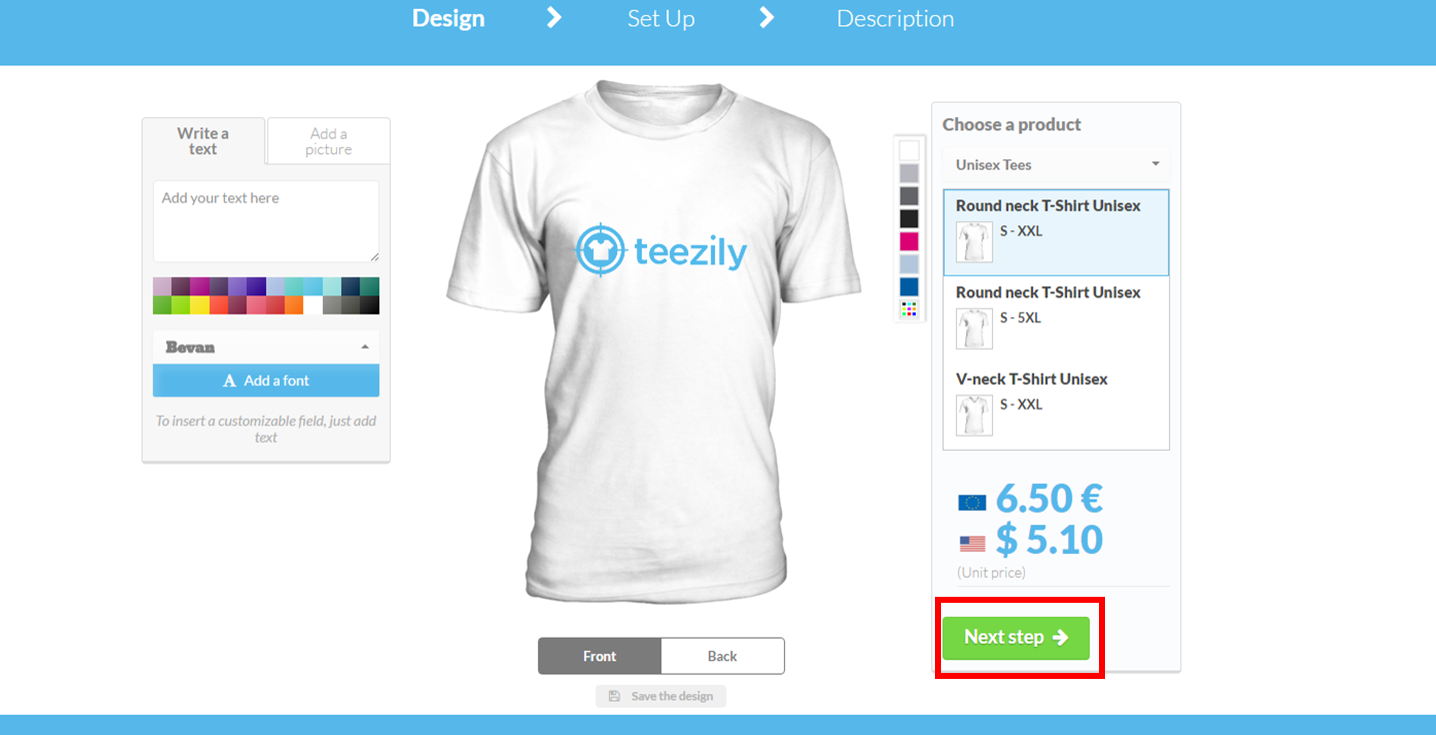
3. Now all you have to do, is to put your design in the desired position on your shirt. You can choose between a front or back design (or both). When you are done, click on “next step”
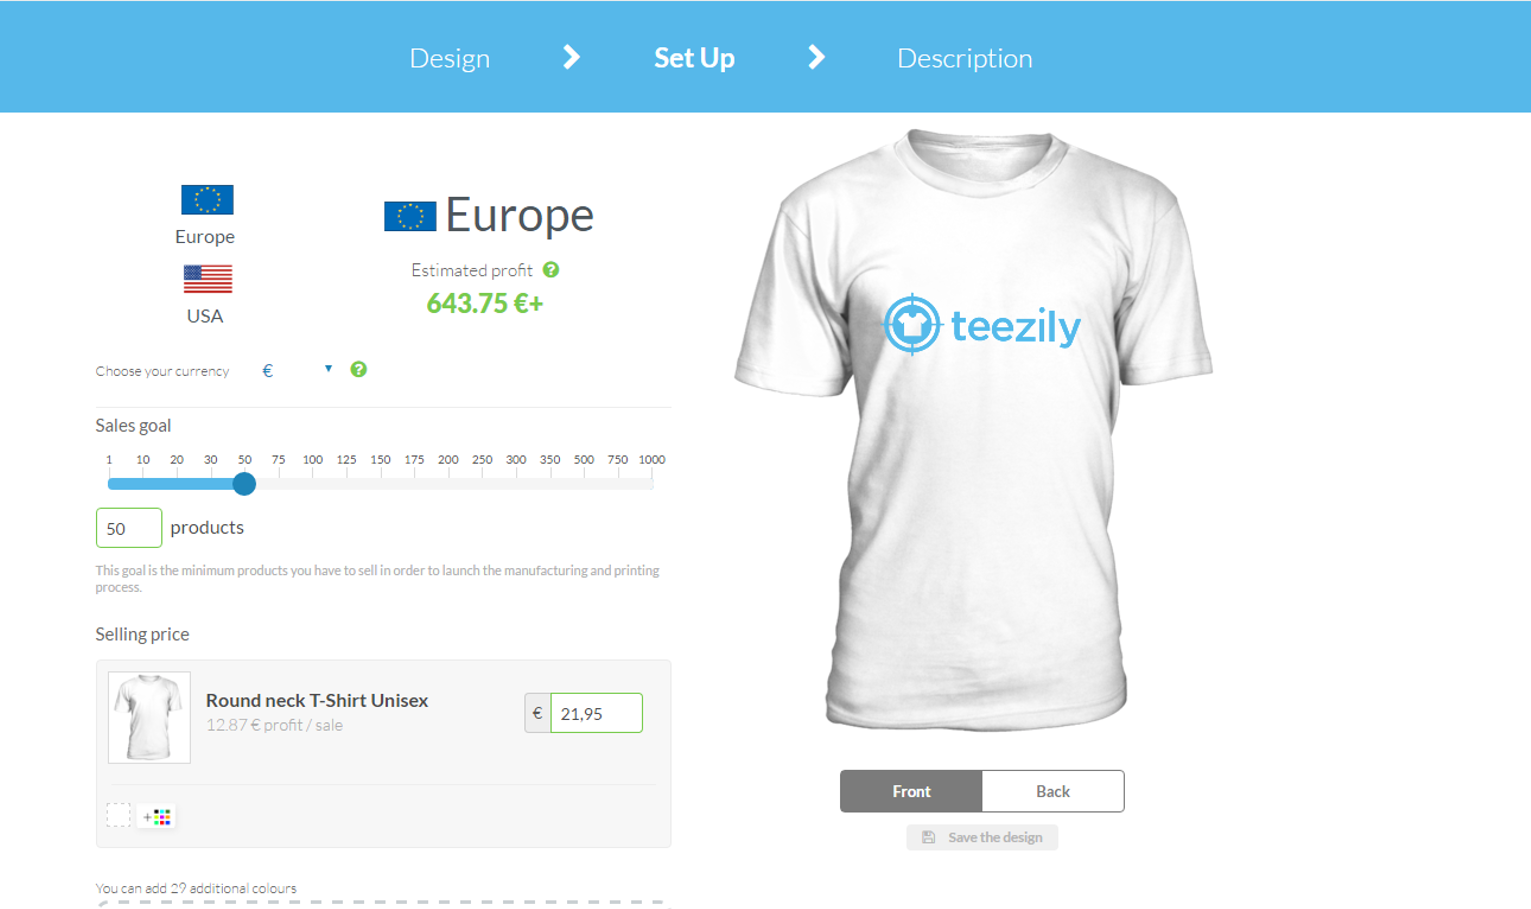
Step 2: Set up your sales goal and selling price
In the next step, Teezily gives you the option to set a sales goal for yourself. This will help you in two ways: motivation and achievement. Regarding the selling price, there are two things you need to know: 1. There is no formula-based approach to pricing. 2. Your ability to sell is what drives sales, not your prices. Also keep in mind that buyers relate price to quality, so although you mustn’t overprice, under-pricing could be just as detrimental.
See the following pictures for a detailed instruction on how to set up the sales goal and the selling price.
1. Choose your currency
2. Set your “sales goal” in products.
3. Determine your selling price: you can choose to make 1, 2, 3 or 5 € for each product, or have a profit equal to 0 €. For this, you only have to set a sale price equal to the minimum price offered by Teezily.
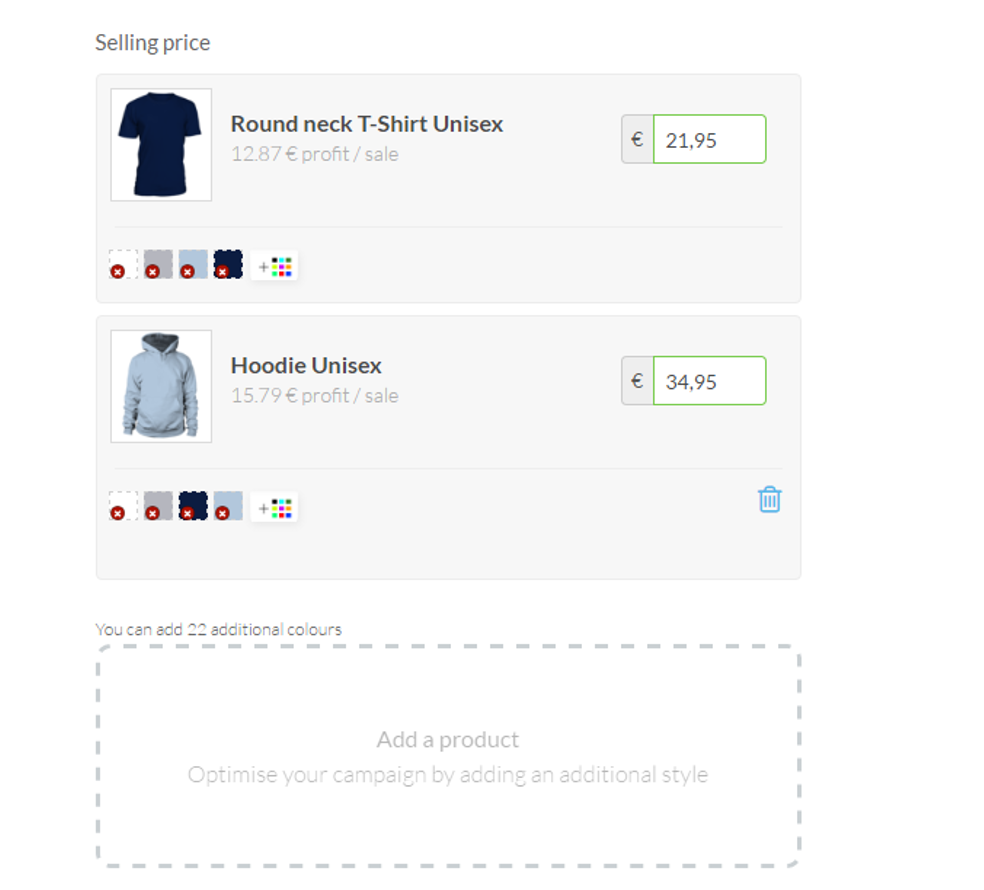
4. Finally, select other products that you want to offer to your customers.
In our example, let’s try and add different colors to our T-Shirt and to add a Unisex Hoodie, also in different colors.
Remember: you have to choose a selling price for each product.
With this, step 2 is completed and you can continue to step 3 by clicking on the “next step” button

Step 3: Add the title and the description to the campaign
1. Choose your title: given that the campaign is only active for a limited period of time, the title must provoke a certain feeling of urgency in the buyers so that they will want to purchase the product immediately. Titles also help you reference your Campaigns when you add them to Teezily’s Marketplace, that is why you should think twice about the title you are going to choose.
2. Description: The description must be attractive and different from that of other campaigns. It has to make the buyer want to purchase the product to feel unique. It is always a good idea to highlight the promotions and use capital letters or a bold font to attract attention to the keywords.
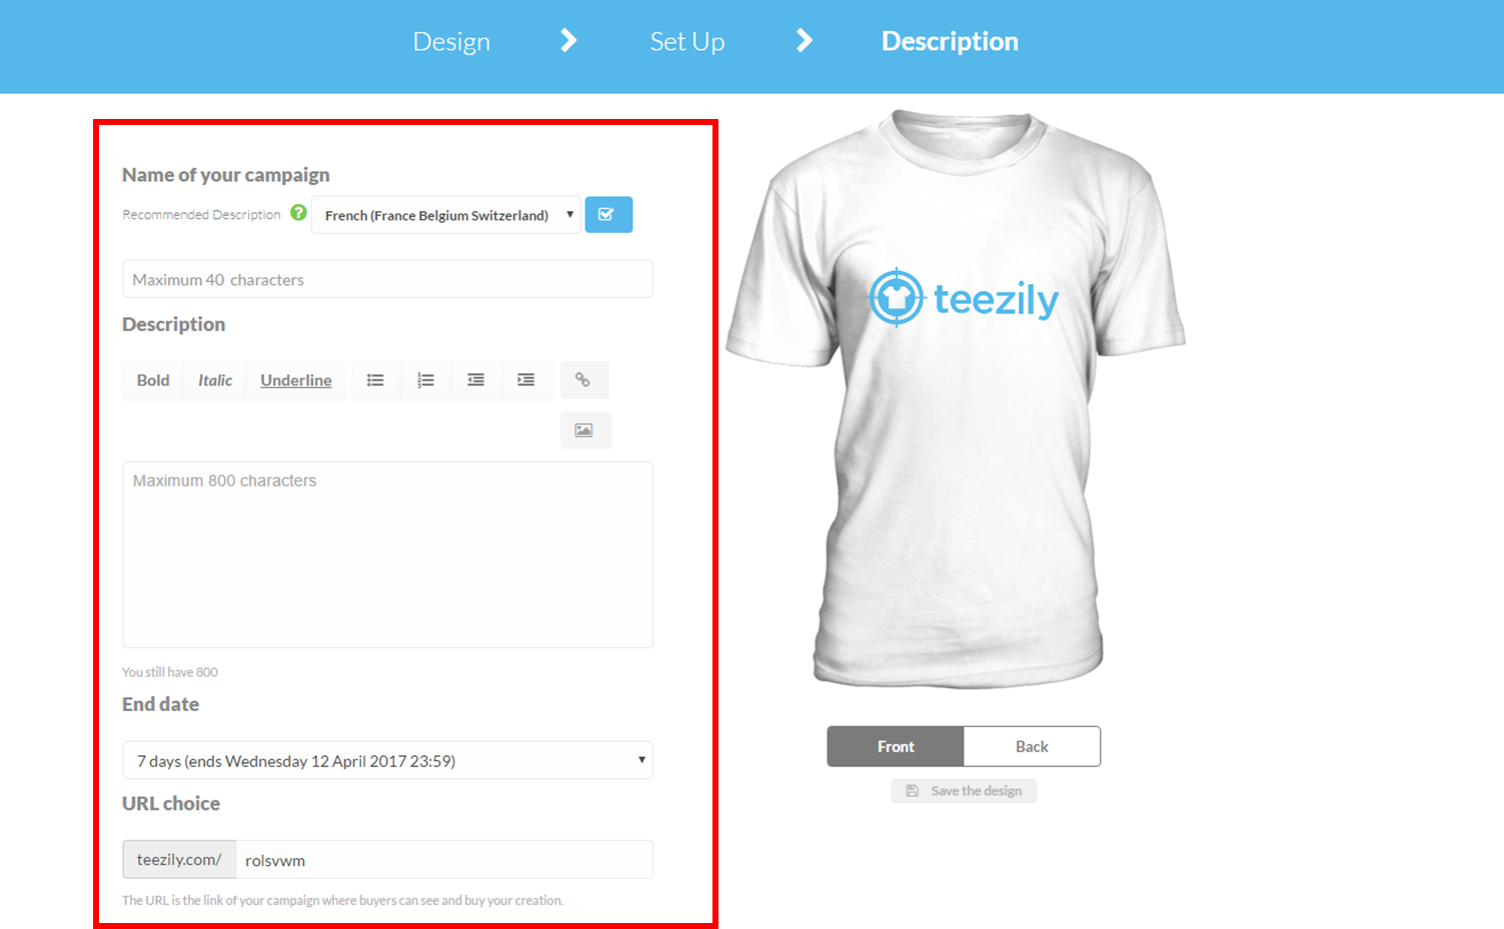
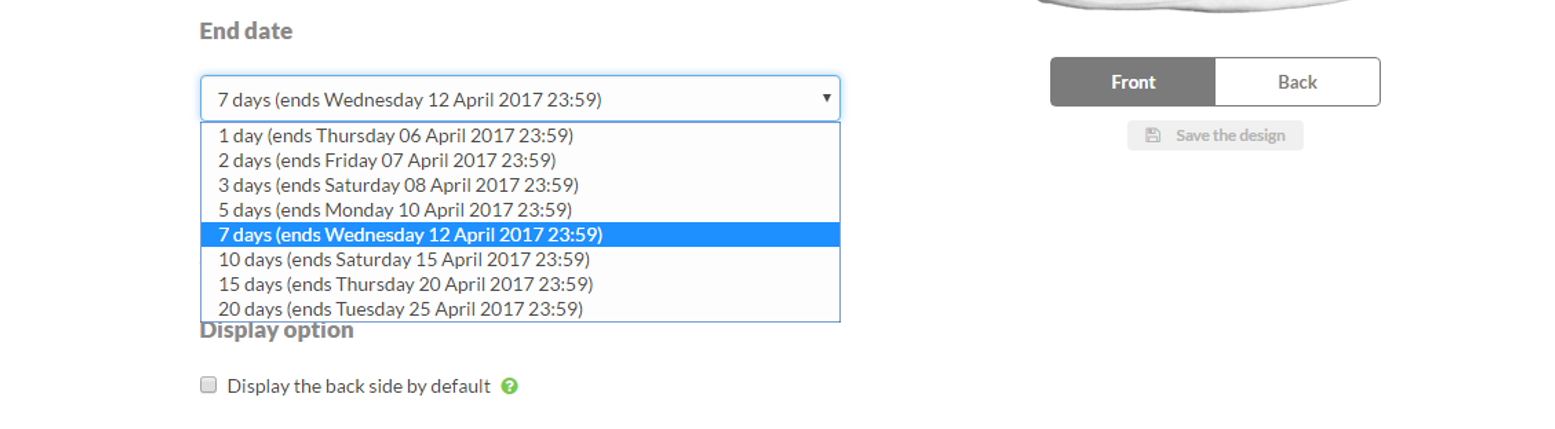
3. Set end date: it can be from 24 hours to 20 days.
4. Create a URL: The URL should be readable and short so that the users may remember it easily. It is also preferable that you use hyphens or underscores to separate the words, since most CMS’s will turn the space into the %20 code, making it harder for the user to read.
5. Choose Display Option: Teezily allows you to display the back of your shirt as well and the front
6. Delivery Options: You can choose to offer the option “Allow customers to pick up their order from you (free delivery). This could be interesting when you are organizing an event, where potential customers are around you.
7. Teezily’s marketplace: Last but not least, click on the option to display your campaign in Teezily’s marketplace. This way everyone, even the people you’re not targeting, can see your campaign. Here you can choose up to three categories under which your campaign will be found.

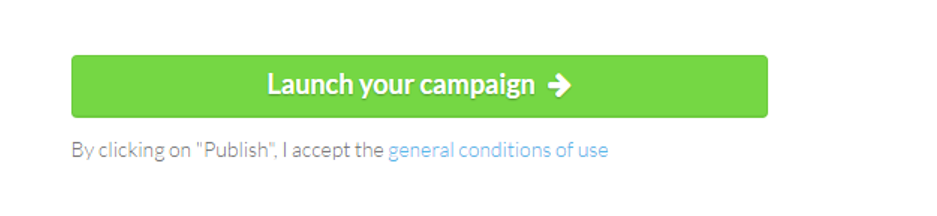
That’s it. You are done and your campaign is ready to be launched!
All you have to do is to click on the launch button
This article will give you step by step instructions on how to create a campaign using Teezily’s customization tool Teezilab.
You can access the tool by visiting our website www.teezily.com and clicking on “Start a campaign now”
Step 1: Design your product
The first step is the design of your product. The only thing you have to do is to choose a product by selecting the model and the color that you want, and upload a design (image and/or text).
1.Choose the model and color of the main product that you want to customize and offer to your audience
2. Upload a design or create one using the differents fonts available
3. Now all you have to do, is to put your design in the desired position on your shirt. You can choose between a front or back design (or both). When you are done, click on “next step”
Step 2: Set up your sales goal and selling price
In the next step, Teezily gives you the option to set a sales goal for yourself. This will help you in two ways: motivation and achievement. Regarding the selling price, there are two things you need to know: 1. There is no formula-based approach to pricing. 2. Your ability to sell is what drives sales, not your prices. Also keep in mind that buyers relate price to quality, so although you mustn’t overprice, under-pricing could be just as detrimental.
See the following pictures for a detailed instruction on how to set up the sales goal and the selling price.
1. Choose your currency
2. Set your “sales goal” in products.
3. Determine your selling price: you can choose to make 1, 2, 3 or 5 € for each product, or have a profit equal to 0 €. For this, you only have to set a sale price equal to the minimum price offered by Teezily.
4. Finally, select other products that you want to offer to your customers.
In our example, let’s try and add different colors to our T-Shirt and to add a Unisex Hoodie, also in different colors.
Remember: you have to choose a selling price for each product.
With this, step 2 is completed and you can continue to step 3 by clicking on the “next step” button
Step 3: Add the title and the description to the campaign
1. Choose your title: given that the campaign is only active for a limited period of time, the title must provoke a certain feeling of urgency in the buyers so that they will want to purchase the product immediately. Titles also help you reference your Campaigns when you add them to Teezily’s Marketplace, that is why you should think twice about the title you are going to choose.
2. Description: The description must be attractive and different from that of other campaigns. It has to make the buyer want to purchase the product to feel unique. It is always a good idea to highlight the promotions and use capital letters or a bold font to attract attention to the keywords.
3. Set end date: it can be from 24 hours to 20 days.
4. Create a URL: The URL should be readable and short so that the users may remember it easily. It is also preferable that you use hyphens or underscores to separate the words, since most CMS’s will turn the space into the %20 code, making it harder for the user to read.
5. Choose Display Option: Teezily allows you to display the back of your shirt as well and the front
6. Delivery Options: You can choose to offer the option “Allow customers to pick up their order from you (free delivery). This could be interesting when you are organizing an event, where potential customers are around you.
7. Teezily’s marketplace: Last but not least, click on the option to display your campaign in Teezily’s marketplace. This way everyone, even the people you’re not targeting, can see your campaign. Here you can choose up to three categories under which your campaign will be found.
That’s it. You are done and your campaign is ready to be launched!
All you have to do is to click on the launch button